How do I make all Outlook calendar appointments or tasks private by default?
Create a template for new appointments or new tasks
Customize and Publish the Appointment Form or Task form
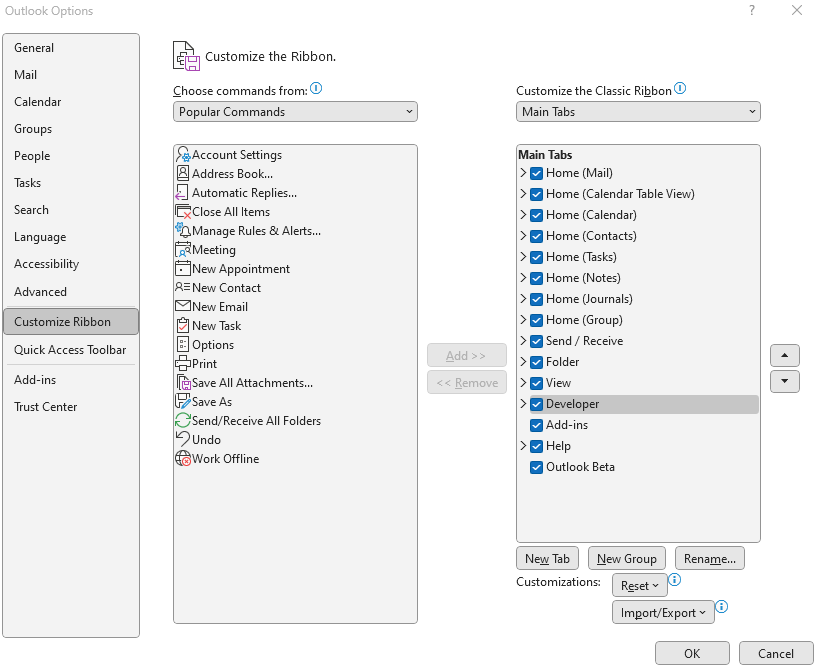
- To be able to make changes to a form, you must first enable the Developer tab in Outlook:
- Press File at the top, next to the Home tab, and choose Options.
- Select the section: Customize Ribbon.
- In the right pane, enable the selection field before "Developer".
- Press OK to close the open dialog.

- Go to your Calendars (blue in image) or Tasks (green in image):

- Open a new appointment or new task
-
Enable the Private option.

- In that same appointment or task, publish the form:
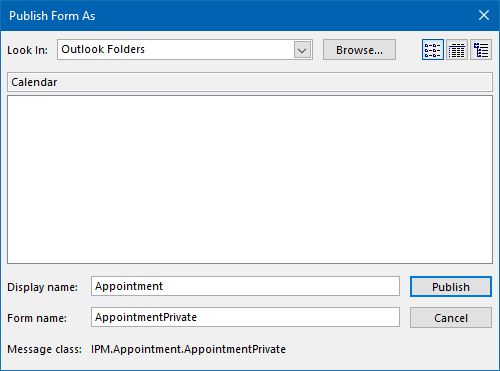
- Select the Developer tab-> Publish-> Publish Form As...

- Select the Developer tab-> Publish-> Publish Form As...
- Set the Look In: dropdown list to: Personal Forms Library
- Provide a Display Name and Form Name for your form and press Publish.
Eg:- Display Name: Appointment
- Form Name: AppointmentPrivate
- Close the appointment or task without saving
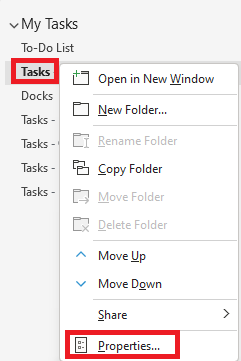
- In the left folder panel, right click on your Calendar or Task folder, ie.
- Calendar - [alias]@stalbans.anglican.org

- Tasks - [alias]@stalbans.anglican.org

- Calendar - [alias]@stalbans.anglican.org
- Choose Properties.
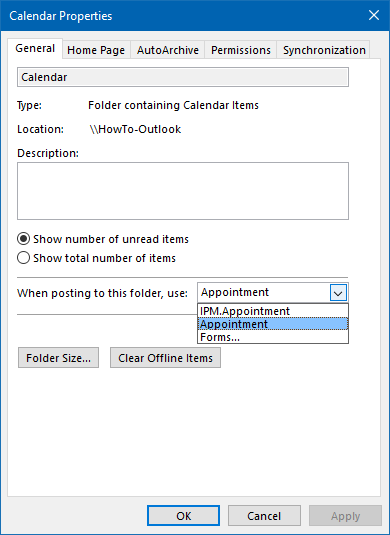
- From the When posting to this folder, use: list choose: Forms...
- Select the Personal Forms Library.
- Select your custom form by its Display Name (from step 7).
-
Now when you open a new appointment or new task, it will have the Private button enabled by default. You can of course still click on the “Private” button to disable it again.
Alternative Method using Multiple Calendars
Another option is to use separate calendars. As Outlook and various calendar applications on smartphones can access or subscribe to multiple calendars and display them in a combined or “Overlay” mode, it would still appear as 1 calendar to you while making sure that your colleagues don’t have access to any details from it.


