
Warning: Biometric sign-in is not supported on all diocesan Windows computers. Look for a fingerprint reader, typically on the laptop's keyboard, and your computer should support Windows Hello.
Note: The biometric and pin data used to support Windows Hello is stored on the local device only. It doesn't roam and is never sent to external devices or servers.
Contents
- Windows Hello Video Tutorial >
- Setup & Manage Sign-in Options on a Windows computer >
- Enable PIN Code >
- How to reset a forgotten PIN Code >
- Enable Facial Recognition >
- Enable Fingerprint Recognition >
- Choose the sign-in method on the lock screen >
- Dynamic lock >
Windows Hello Video Tutorial
Learn how to set up Windows Hello in Windows 11. Windows Hello offers a more personal way to sign-in to your Windows devices for systems that support biometric inputs, such as a fingerprint sensor or an infrared camera sensor. With just a look or touch of a finger, you’ll get enterprise-grade security without having to type in a password.
Setup & Manage Sign-in Options on a Windows computer
- Open the Settings System app:
- Select the Windows key
 > Type Settings > Select Settings
- Select the Windows key
- Select Accounts
- Select Sign-in options

Enable PIN Code
Note: When enabling additional sign-in methods like biometrics, you must also set up a PIN code as a secondary option. A PIN is not a replacement for your diocesan password and only applies to the device you've set it up on (like a mobile phone PIN).
You can either create the PIN first or be prompted to do so when enabling another sign-in method. To setup a PIN code first:
- In Settings > Accounts > Sign-in options expand PIN (Windows Hello)
- If it says This option is currently unavailable then this option is currently disabled, most likely because your computer doesn't support biometric sign-in options. Continue to sign in with your password instead.
- Select Set up

 Select OK to use Windows Hello with your account
- Sign in with your diocesan Microsoft credentials
- Enter a new pin code twice
- The minimum pin code requirement is 8 numbers.

- The minimum pin code requirement is 8 numbers.
PIN Code Options
- Once a PIN code is setup you can change options in:
Settings > Accounts > Sign-in options > PIN (Windows Hello) >- Change your PIN to replace your existing PIN code with another code
- Remove this sign-in option is not possible once setup. If you wish to no longer use a PIN code please raise a support ticket and the IT Team will remove it for you.
- I forgot my PIN resets your PIN code with your diocesan Microsoft credentials if you have forgotten what it is. See How to reset your PIN Code >
- Related options (once the relevant sign-in method has been setup):
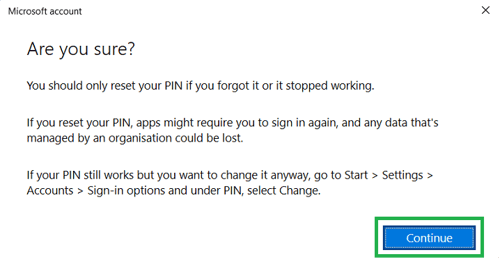
How to reset a forgotten PIN Code...
Note: Resetting a forgotten PIN code may cause apps to require you to sign in again. If you know the passcode already, select to Change your PIN instead.
...when signed in
- In Settings > Accounts > Sign-in options expand PIN (Windows Hello)
- Select I forgot my PIN
- Follow the on-screen instructions to reset your PIN code.
...when on lock screen
Tip: You can still sign in with your diocesan Microsoft password even if you've forgotten your PIN code. Select Sign-in options and the key icon to enter a password.
- On the PIN sign-in method select I forgot my PIN

- You will be asked to sign in with your diocesan Microsoft credentials
- Follow the on-screen instructions to reset your PIN code.
Enable Facial Recognition
Tip: Windows Hello uses facial recognition that can tell if you're a real person or just a photo. It works best when you look at the screen naturally - no need to freeze or stare. Instead just be yourself and it will recognize you more easily.
- In Settings > Accounts > Sign-in options expand Facial recognition (Windows Hello)
- If it says This option is currently unavailable then you do not have capable hardware to support facial recognition. Please try another sign-in option.
- Select Set up

- Select Get started

 If requested, enter your PIN number
- Your camera's view will then be shown on-screen.
- If you cannot see your camera's image and it is black, ensure the webcam's privacy cover is not blocking the camera. There's usually a slide to open and close in front of the camera.
- Follow the on-screen instructions.
- Once it has scanned your face, if you wear glasses it is recommended to select Improve recognition to scan again with your glasses off.
- Once setup, you should not need to remove your glasses every time you authenticate

- Once setup, you should not need to remove your glasses every time you authenticate
- If you haven't set up a PIN code yet select Set up PIN
- Enable auto dismiss the lock screen and enhance facial recognition protection in the Facial Recognition Options...
Facial Recognition Options
Once facial recognition is setup you can change options in:
Settings > Accounts > Sign-in options > Facial recognition (Windows Hello) >
- Automatically dismiss the lock screen if Windows recognises your face
- Recommended option = On
- If disabled, facial recognition will not work to unlock your Windows lock screen. Disable if you wish to remove this feature but keep your stored facial recognition data.
- Enhance facial recognition protection
- Recommended option = On
- This feature increases the security of facial recognition by making it harder for attackers to spoof your identity using photos, videos, or 3D models of your face.
- Enabling may decrease facial detection particularly in low-light conditions or if your appearance changes significantly. If the latter, remove facial recognition as an option and setup again.
- Make your sign-in more personal to rescan your face to improve face detection
- Remove this sign-in option if you wish to stop using facial recognition for sign-ins or for setting it up again
Enable Fingerprint Recognition
- In Settings > Accounts > Sign-in options expand Fingerprint recognition (Windows Hello)
- If it says This option is currently unavailable then you do not have capable hardware to support fingerprint recognition. Please try another sign-in option.
- Select Set up

- Select Get started

- If requested, enter your PIN number
- Touch the fingerprint sensor lightly on the computer.
- On Dell Latitude computers this is usually either a glass looking square near the touchpad or the power button.
- If the sensor is the power button, press down lightly without pressing the actual power key.

- Follow the on-screen instructions to scan your fingerprint

- On Dell Latitude computers this is usually either a glass looking square near the touchpad or the power button.
- Once you have finished scanning your finger, select either Add another finger or Close if you wish to stop. If you haven't yet setup a PIN code, select Set up PIN

Fingerprint Recognition Options
Once fingerprint recognition is setup you can change options in:
Settings > Accounts > Sign-in options > Fingerprint recognition (Windows Hello) >
-
- Add a finger to scan another finger and use to unlock your computer
- Remove this sign-in option if you wish to stop using facial recognition for sign-ins or for setting it up again
Choose the sign-in method on the lock screen
On the Windows lock screen, your computer will offer the last sign-in method that you used to unlock the system.
If you wish to change the sign-in method select Sign-in options and select the sign-in method icon that you wish to use - see below:

Sign-in method icons (left to right in picture above)
Note: Only the sign-in options that are supported on your computer will be shown.
- Fingerprint icon = Fingerprint recognition
- Card icon = Smart card
- USB drive icon = A FIDO USB Security Key (eg. Yubikey)
- Number pad icon = PIN code
- Globe icon = Web Sign-In
- Face icon = Facial recognition
- Key icon = Password
Dynamic lock with a Phone
Windows Settings > Accounts > Sign-in options > Additional settings >
Dynamic lock is a feature that locks your Windows computer when you walk away with a Bluetooth paired mobile phone. Note your computer will not unlock automatically when your mobile is back in range.
To enable:
- Select Allow Windows to lock you device automatically when you're away
- Pair your mobile with your computer via Bluetooth if you haven't already