
Contents
- Permission to send >
- 'Send as' vs 'Send on behalf of' >
- Change the From field in:
- Troubleshooting error "You don't have permission to send" >
Permission to send
If you already have access to incoming emails from the shared mailbox, distribution list, group etc then in most cases you have permission to send as well.
For other people's mailboxes, by default you do not have permission to send as them. The IT Team will require direct authorisation from the person you are trying to send before permission is granted. Please ask them to specify which option of sending is allowed.
After sending your first email, if you receive a bounce back saying you don't have permission please raise a support ticket.
'Send as' vs 'Send on behalf of'
There are 2 methods of sending:
- Send as sends the email from the email address you have used. For example:
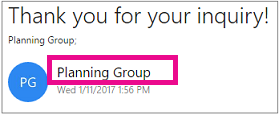
- Send on behalf of sends the email from the email address you have used but displays a message to the recipient that you have sent the email on behalf of the other person, distribution list or group. For example:

The permission for either option is set by the IT Team. Please specify which option you would like to use or, for other people's mailboxes, specify this in the authorisation.
Change the From field in Outlook Classic Desktop App
- In Outlook Classic, select New Email

- From will display the default email address for that message:

- If From is missing and you can only see To and CC:
- Select Options > under Show Fields select From

- Select Options > under Show Fields select From
- If From is missing and you can only see To and CC:
- To change the from address from the address shown, select the From dropdown button and select the email address you wish to send from:

- To remove an address:
- Select the X on the right of the listed address.
- To add an address:
- Select Other email address...

- In the From... field type the full email address you wish to use > select OK

- Select Other email address...
- To remove an address:
- Continue composing the email.
- If you see a message saying you don't have permission to send as that email address please see the troubleshooting steps below...
Change the From field in New Outlook app & Outlook on the Web
- Go to https://outlook.office.com
- Sign in if requested
- Create a New email

- If From is missing and you can only see To and CC:
- Select Options > under Show Fields select Show From

- From will display the default email address for that message:

- If From is missing and you can only see To and CC:
- To change the from address from the address shown, select the From dropdown and select the email address you wish to send from:

- To remove an address:
- Select the X on the right of the listed address.
- To add an address:
- Select Other email address...

- In the From field enter and select a person's name or shared mailbox or type the full email address you wish to send from > select Use this address

- Select Other email address...
- To remove an address:
- Continue composing the new email.
- If you see a message saying you don't have permission to send as that email address please see the troubleshooting steps below...
Change the From field in the Outlook Mobile App
- In the Outlook Mobile app create a new email
- Select the email address you would like to send from.
- For shared mailboxes the mailbox has to be added first. See:
- For other aliases you own, see:
Troubleshooting error "You don't have permission to send"
- Check you have been given permission by the mailbox owner or IT Team.
- If using Outlook Desktop, check permissions are setup correct on the server by sending a test message from Outlook on the Web
- Ensure you have typed in the correct email address in the From field.
- If using Outlook Desktop, update the offline global address book to sync permissions with the server:
- Try removing the email address from the From field and re-adding:
- Select X next to the email address cached and re-add as above.

- Select X next to the email address cached and re-add as above.
- Raise a support ticket with the address you are trying to send from.